Camper Modifications
Speaker Upgrade
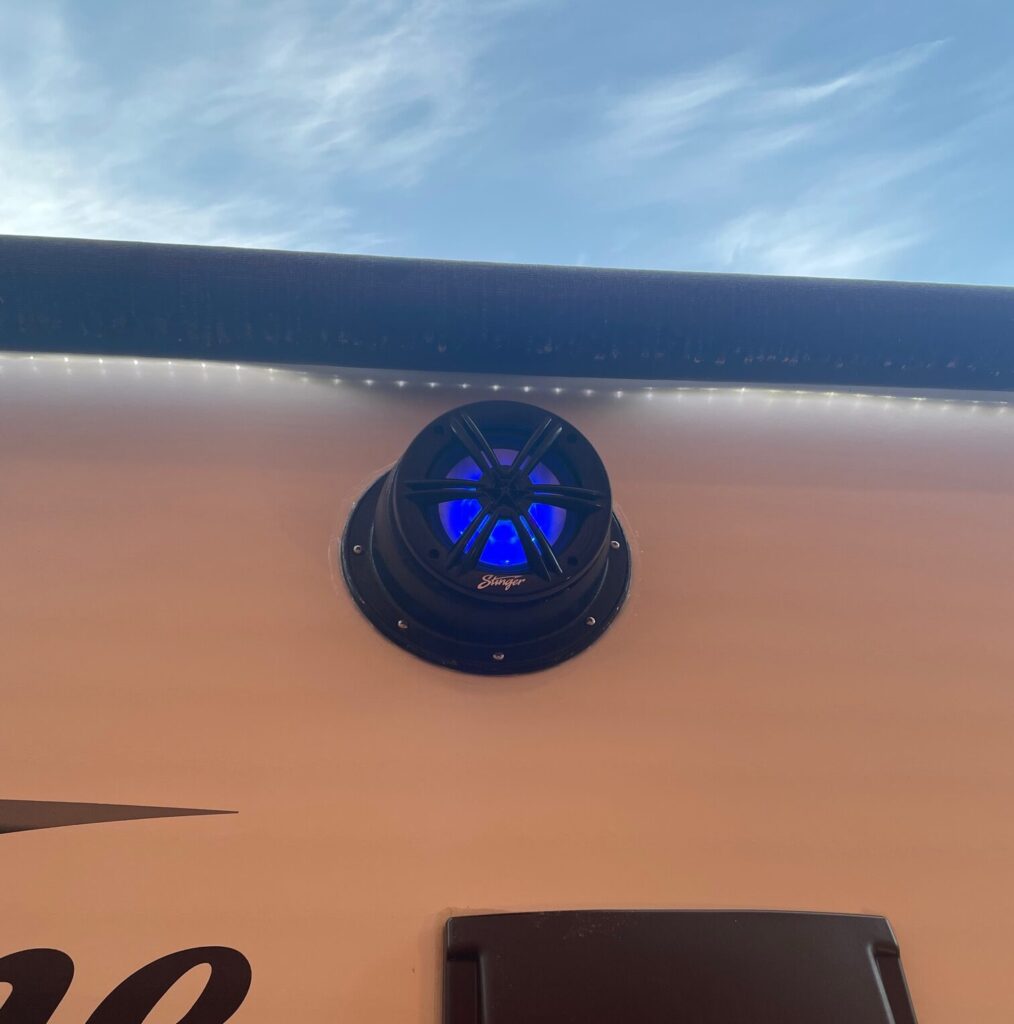
Our Grand Design Imagine factory speakers and awning lights went out in October of 2021, after five years of having the camper. We figured out there is 2 amp fuse for the awning lights behind the main control panel for the slide, awning, etc. right inside the door. Replacing the speakers was one of those projects that you think will take 1-2 hours, however we spent two evenings and a little bit of troubleshooting to figure out the LED lights within the speakers.
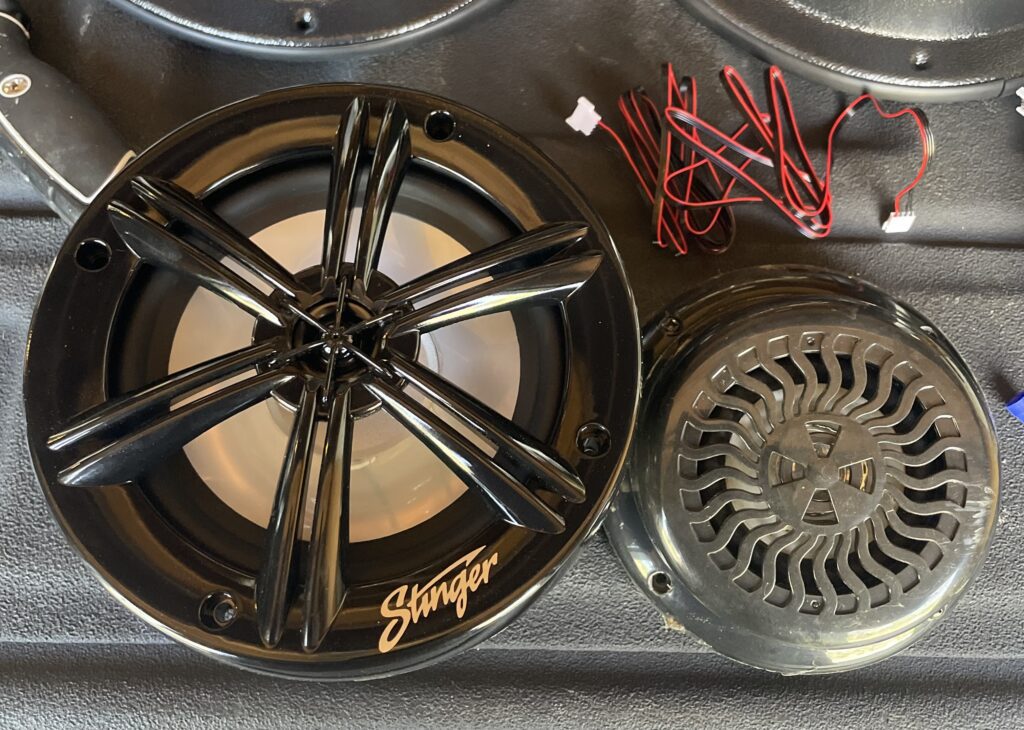
We purchased the Stinger 2-way Marine LED speakers (SEA65RGBB) from Best Buy on sale for $112. The speakers required a housing and we purchased the enclosure from amazon. Those came with a hole cut out, however it wasn’t big enough so we needed a couple of tools.
- Drill
- 6 inch hole saw to cut opening for housing
- wire strippers
- electrical wire connectors kit
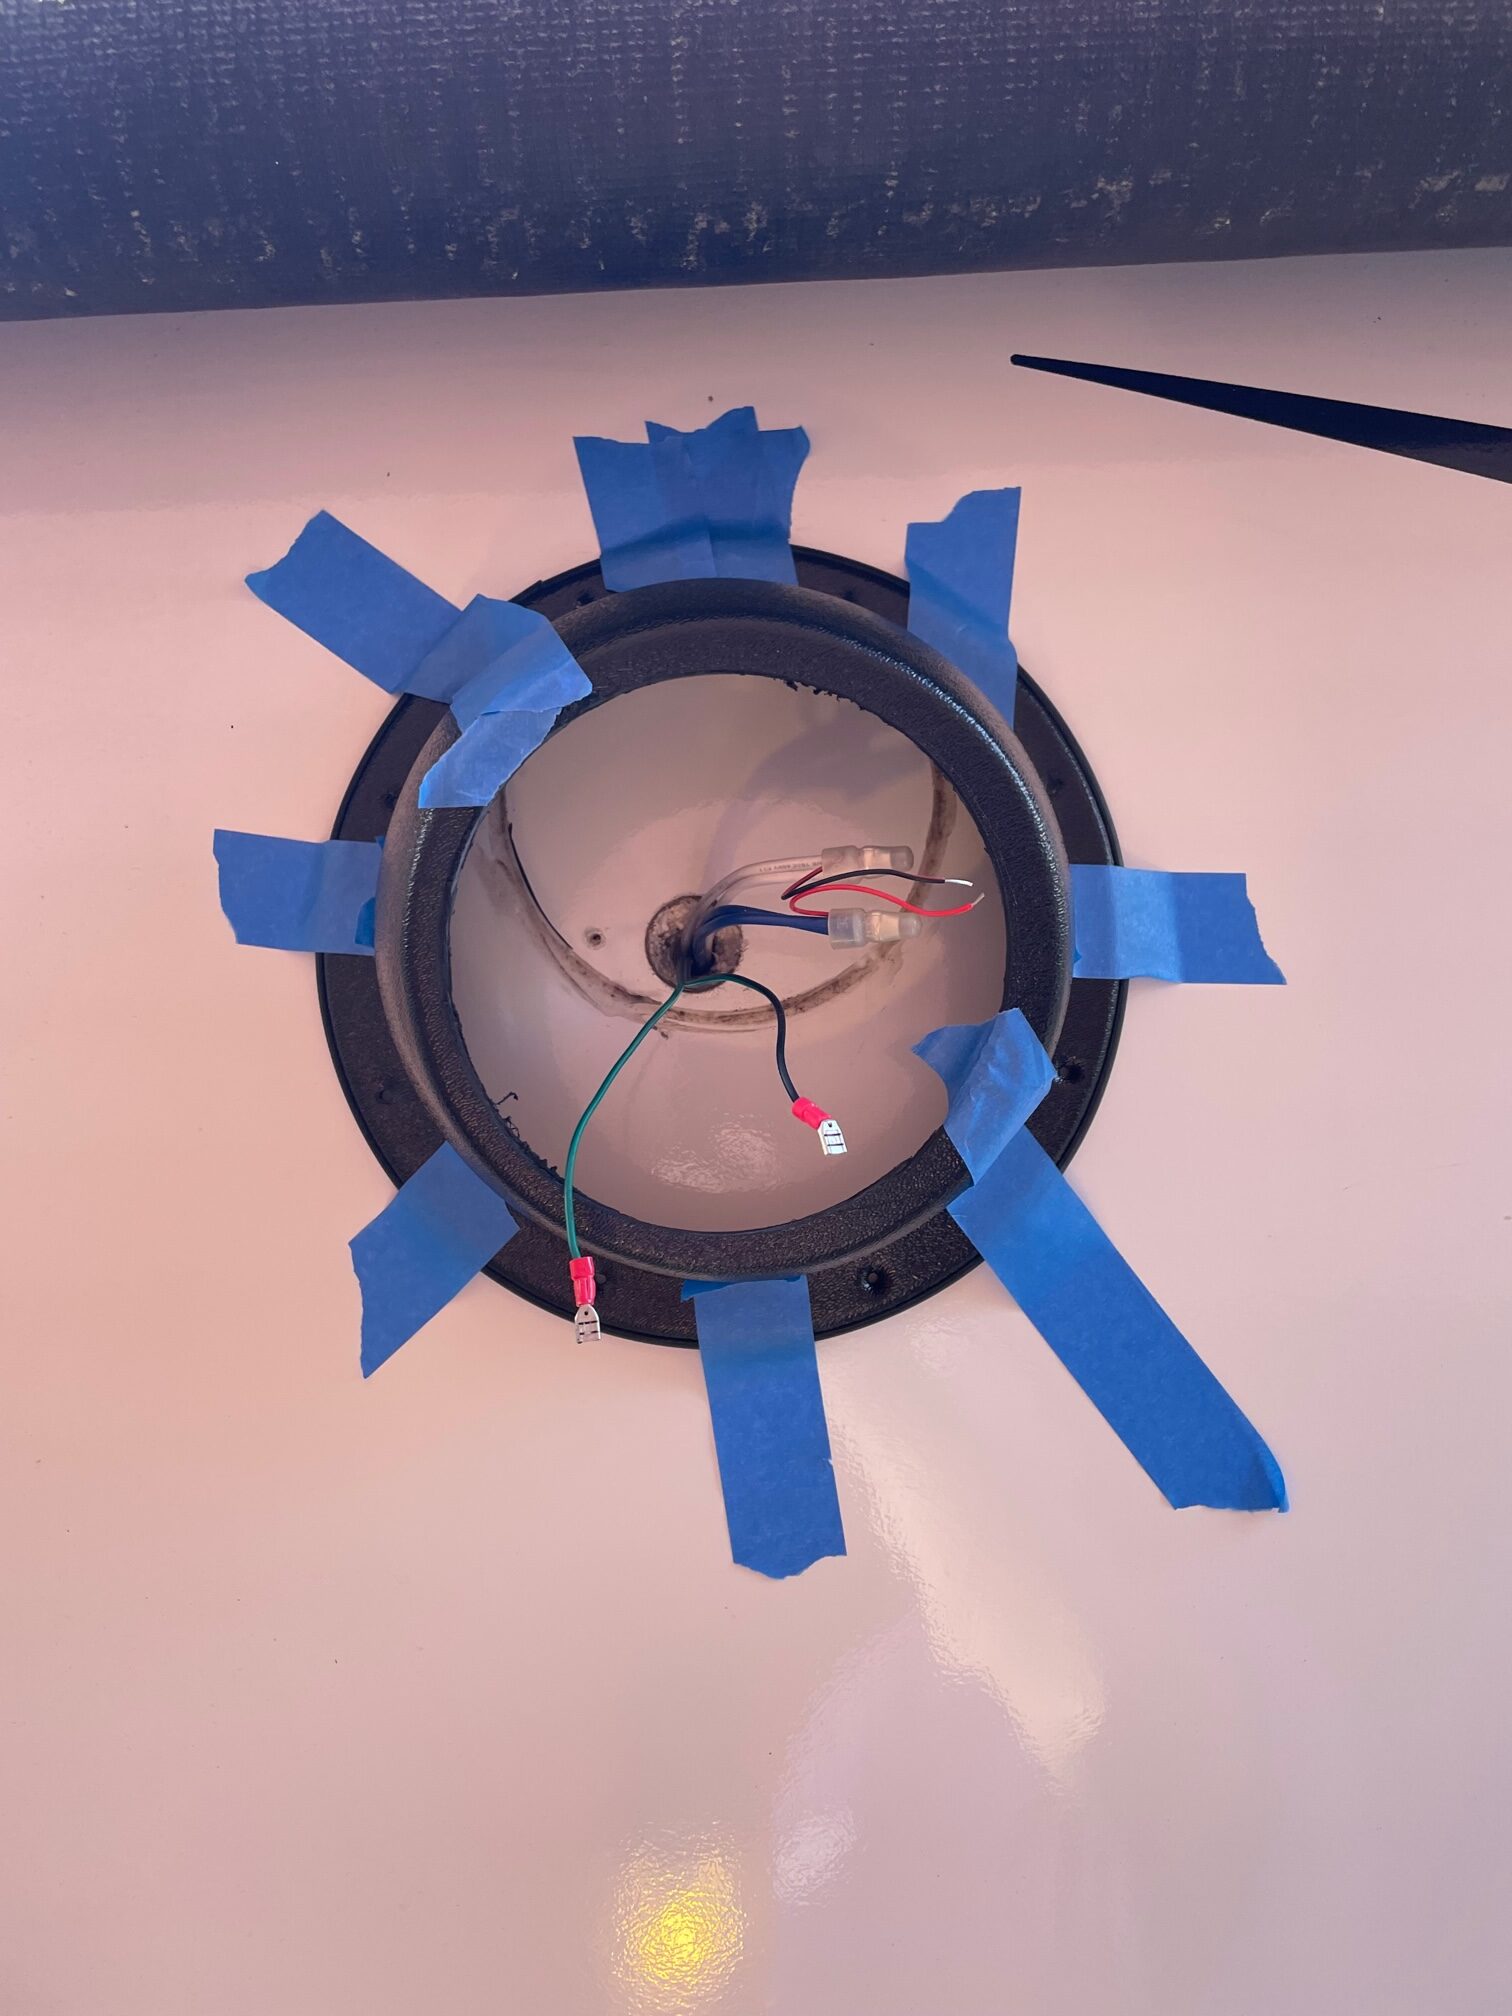
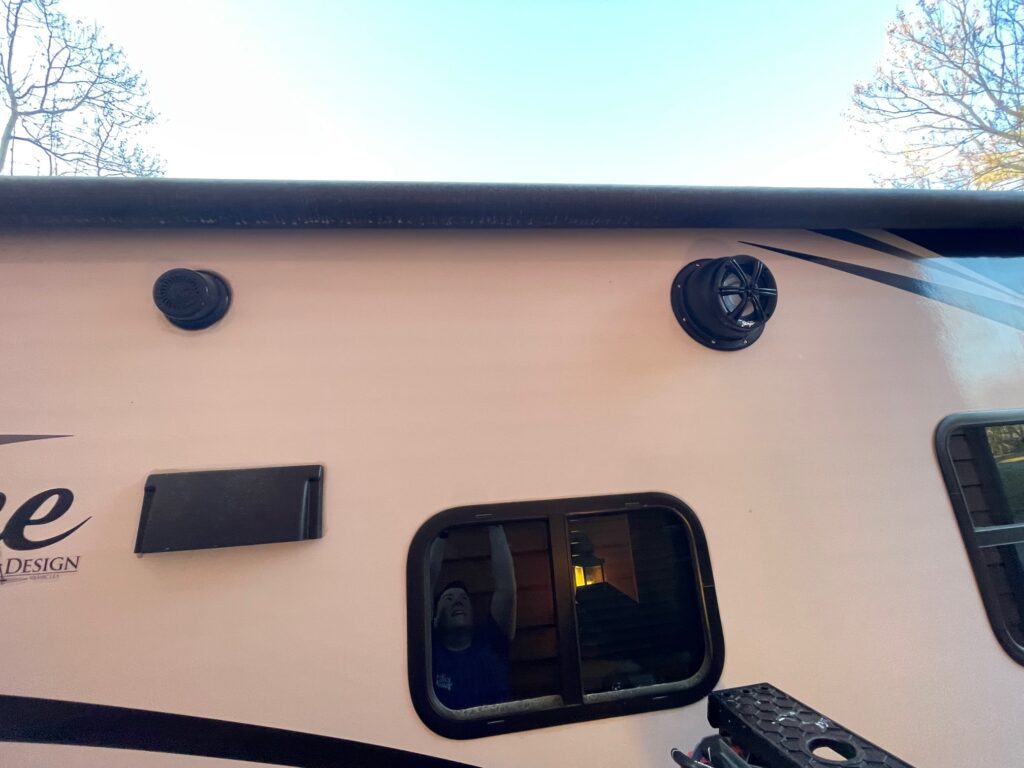
Screw the housing down to a piece of wood on two sides before trying to attempt cutting the hole. If there is already an opening like ours, you will need to also screw scrap into the center for the bit to grab onto. We measured about 5 inches down from the gutter to place the housing on the side of the camper and taped it in place before securing the enclosure for the speaker.
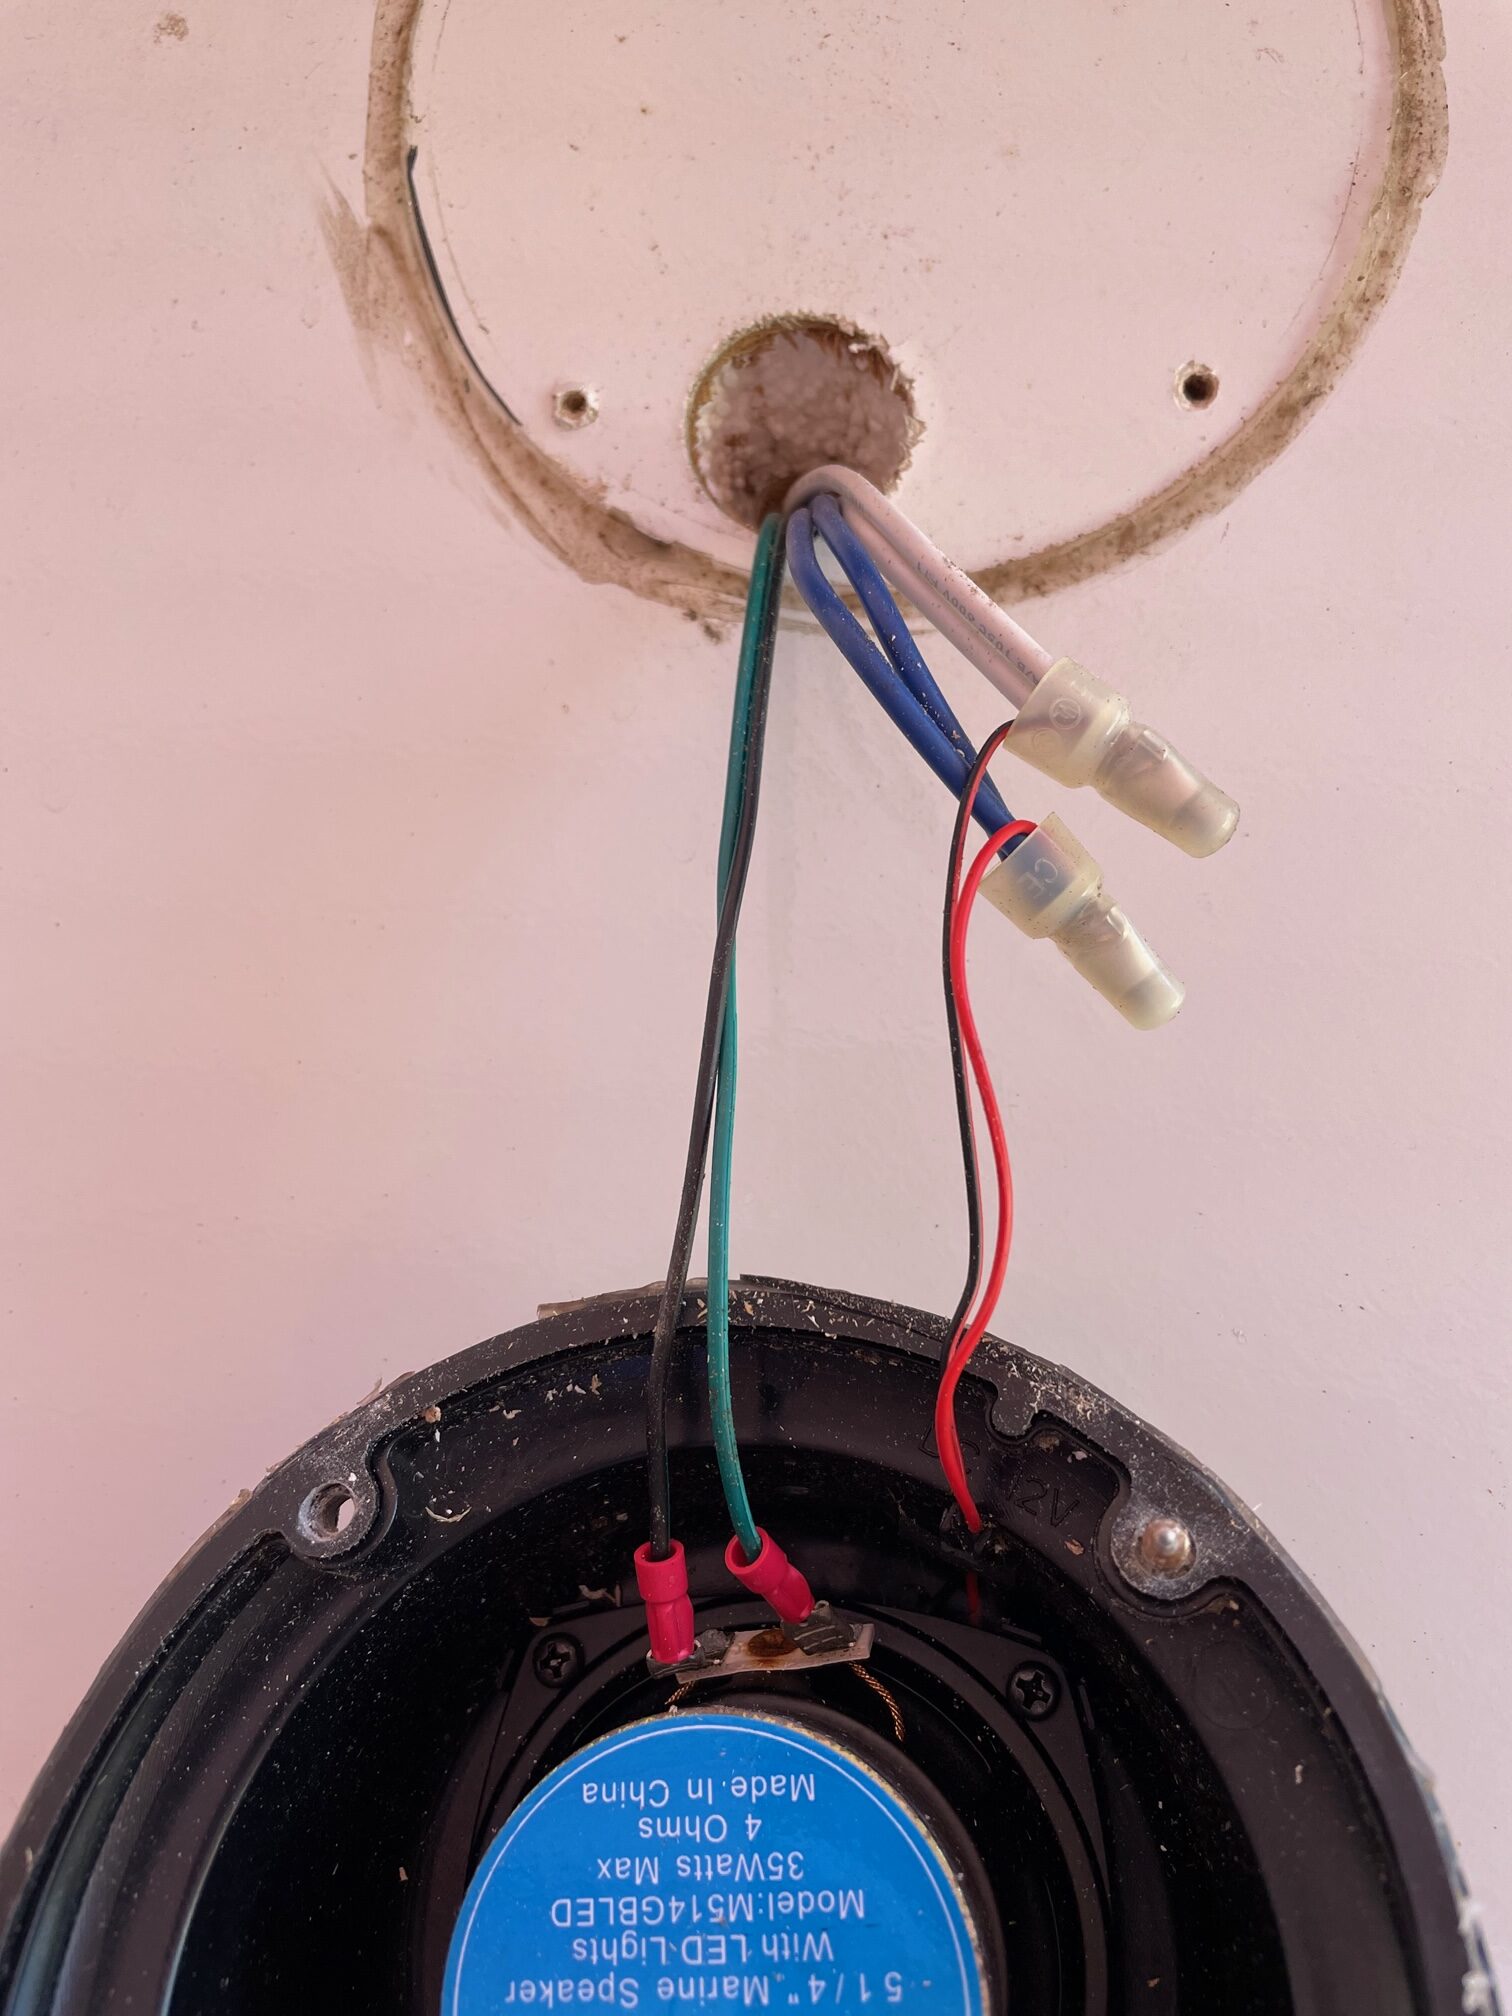
The factory wiring for speakers was an easy plug and play to get sound out of the new speakers. The light wiring needed to be ran black to blue and red to white. To get the colors working we also had to determine which black wire was which color (green, blue, red) once determining the color we wanted to go with, blue, we were able to hard wire it in. This allows the color to come on automatically with the awning light switch and not require the remote that came with the speakers. The stringer speakers did not come with a manual or directions, but we were able to find a little bit of guidance online. We only have basic electrical knowledge and with a little frustration felt comfortable doing this modification ourselves.
We added Starbrite marine silicone sealant to the connection point of the speaker and enclosure, as well as around the edge of the pod enclosure and the camper. This will prevent any water from getting inside the housing in the future.
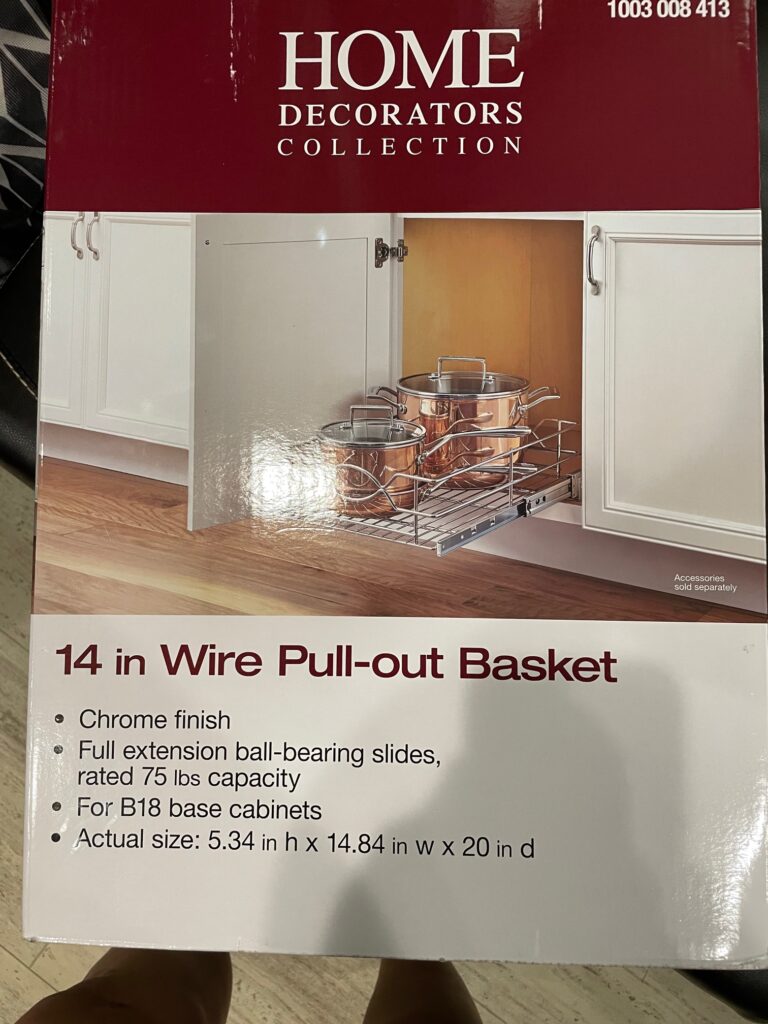
Pantry Pull Out Drawers
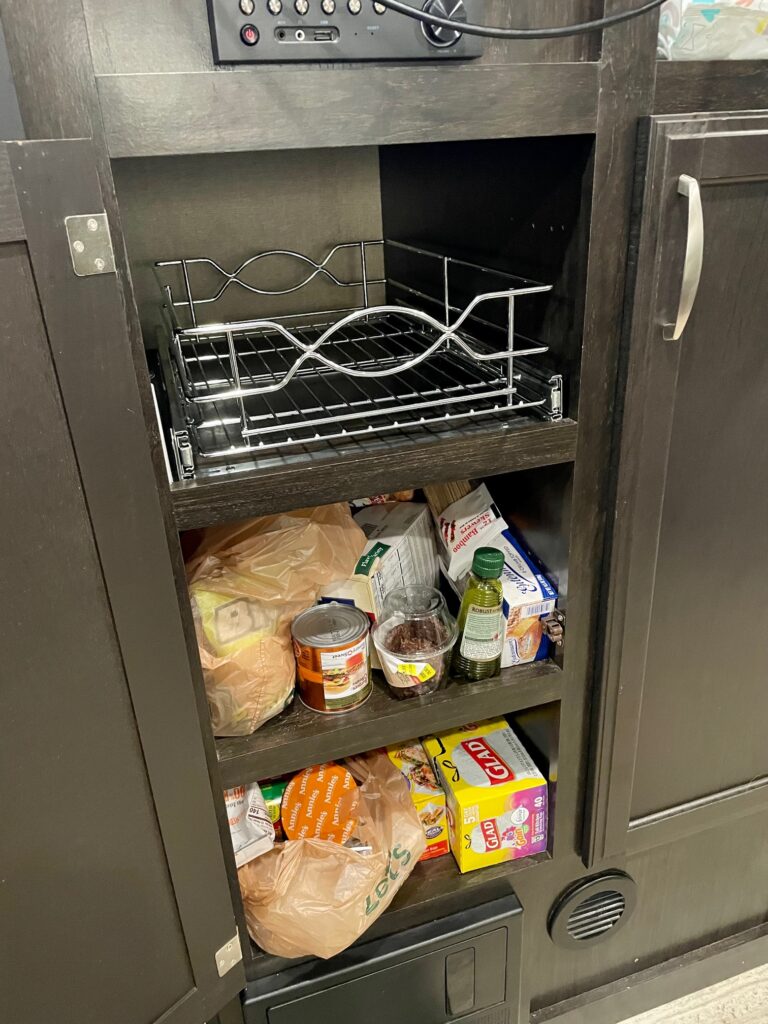
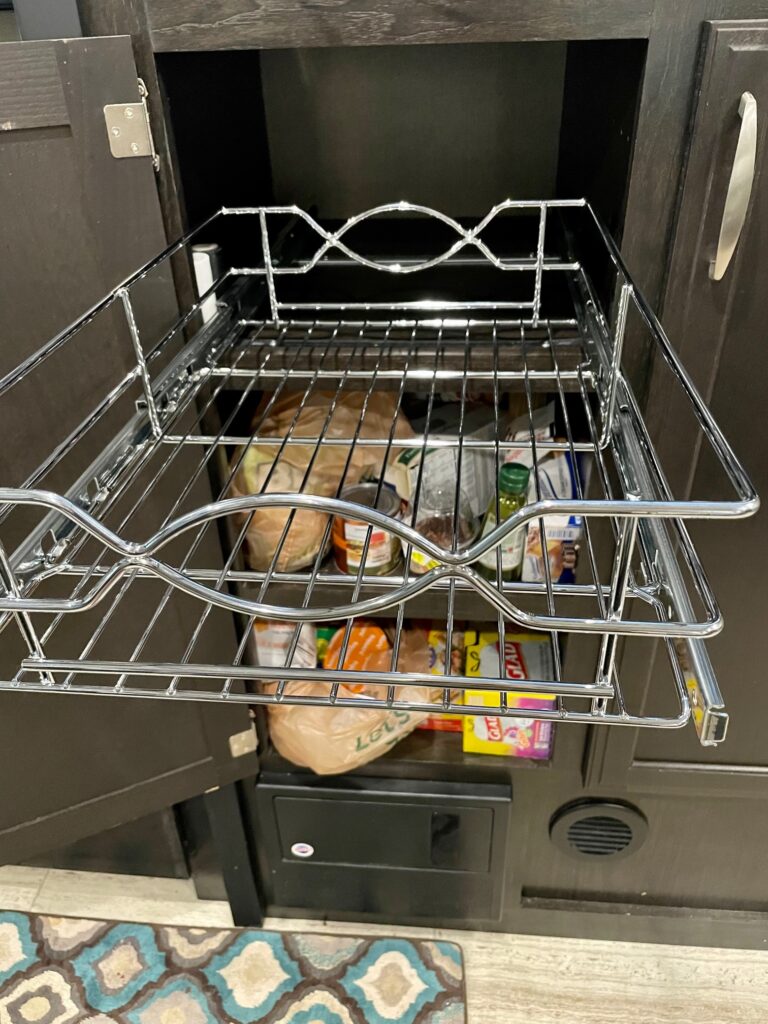
After five years of camping we finally invested in pull-out drawers for our pantry cabinets. The cabinets are deep and we could not easily see what we had already packed for the trip. The stainless steel drawers we bought pull completely out of the cabinet for easy inspection. This is by far my favorite modification in the camper.
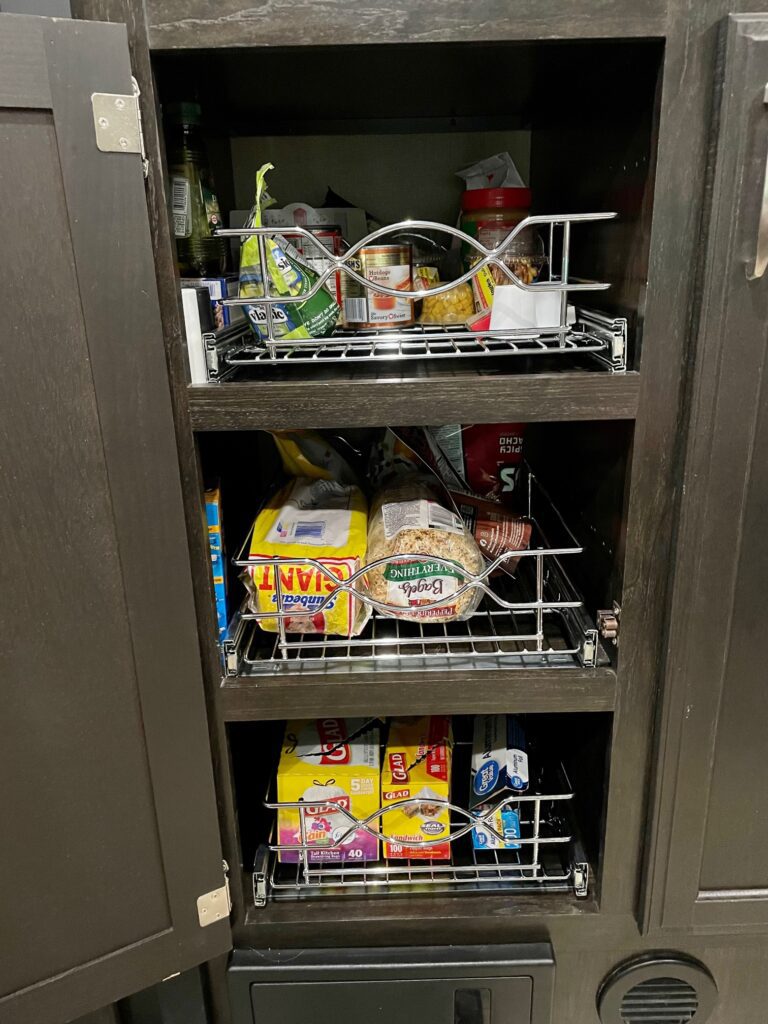
The cabinet opening for our Grand Design Imagine 2150 is 15 inches, though the middle drawer has the cabinet door attachment in the way. The Home Decor Collections drawer is 14 inches, which leaves room on the side of the cabinet to store spices, macaroni boxes, and other narrow items. We only secured the drawers to the bottom of the cabinet. You can find the drawers at Home Depot for $55 each.
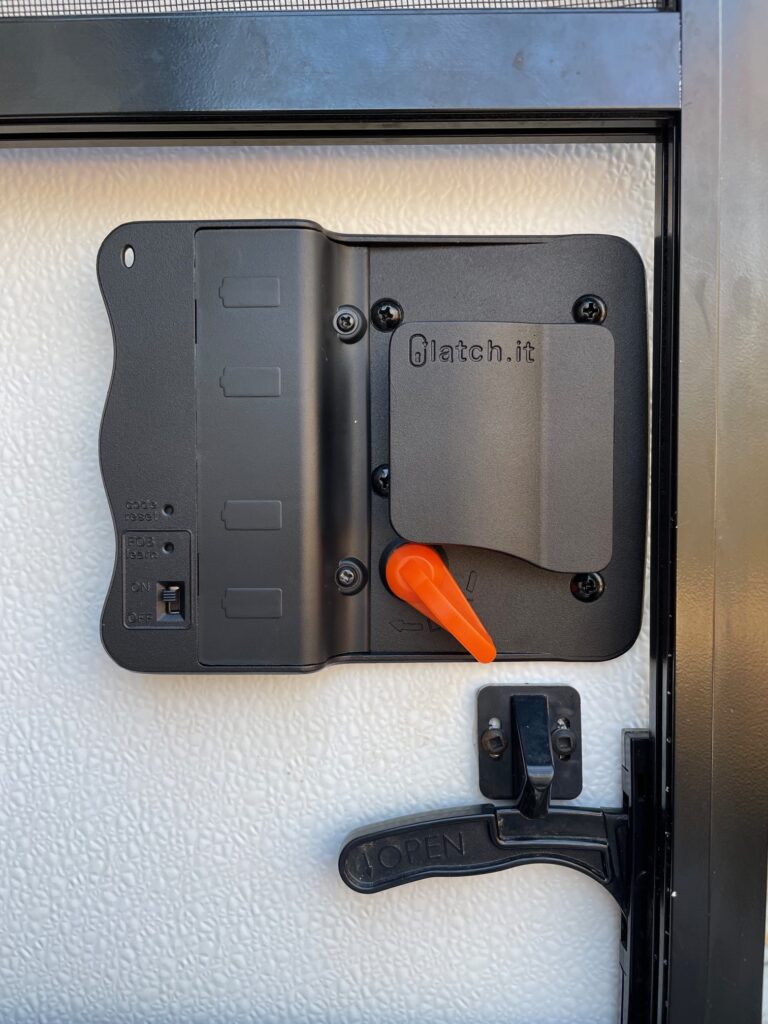
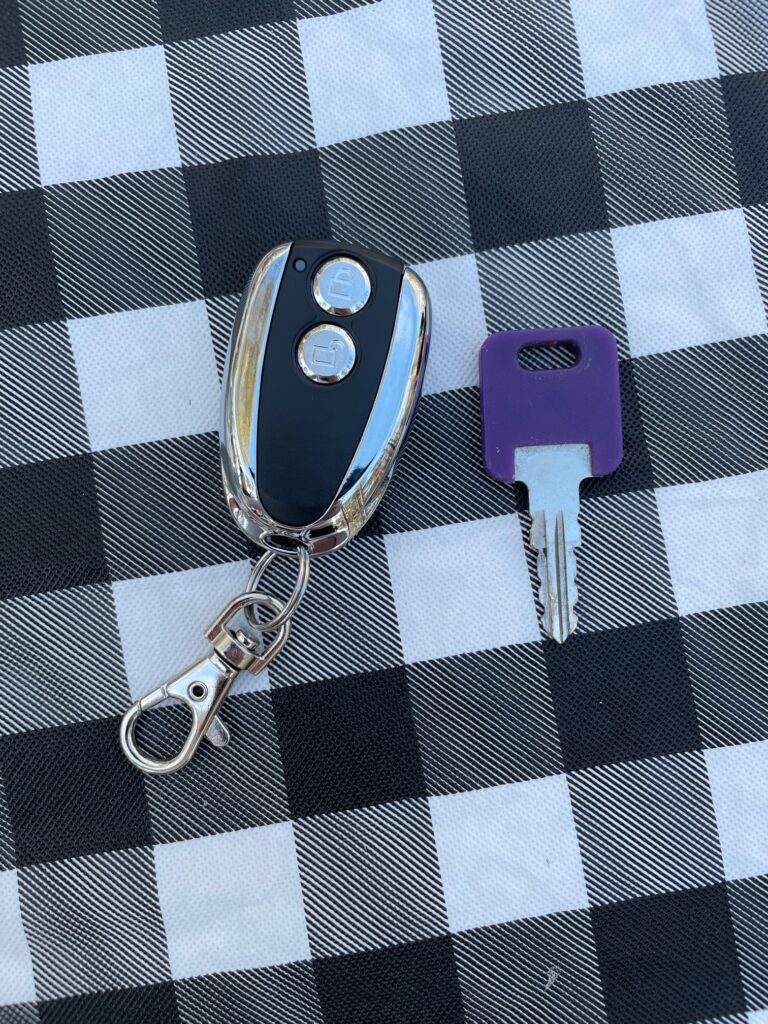
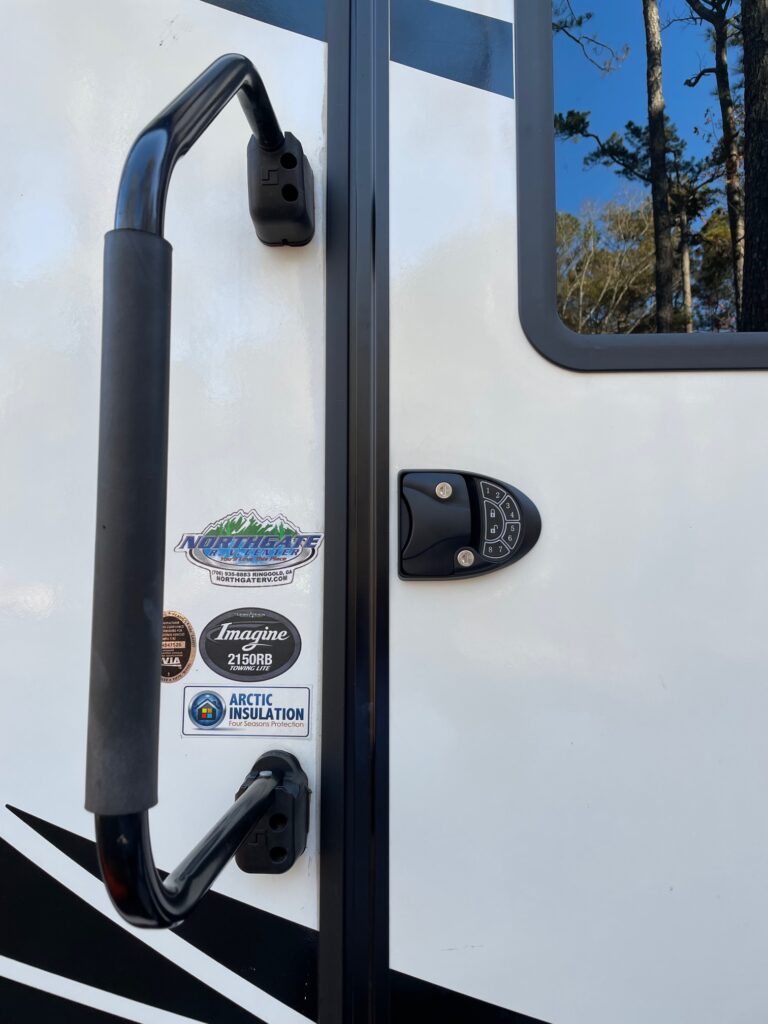
Latch It RV Keyless Lock
Latch It sent us their keyless RV lock a couple weeks before our trip to Red Top Mountain State Park. We installed it at the campground. Why did we wait so long?! It’s so nice to be able to unlock our camper with the key pad or the two key fobs it came with. The Latch It RV lock has lifetime warranty. They gave us a 15% discount affiliate code to share with our followers – Imaginecamper

Turbo Charged AC Modification
Coming soon.
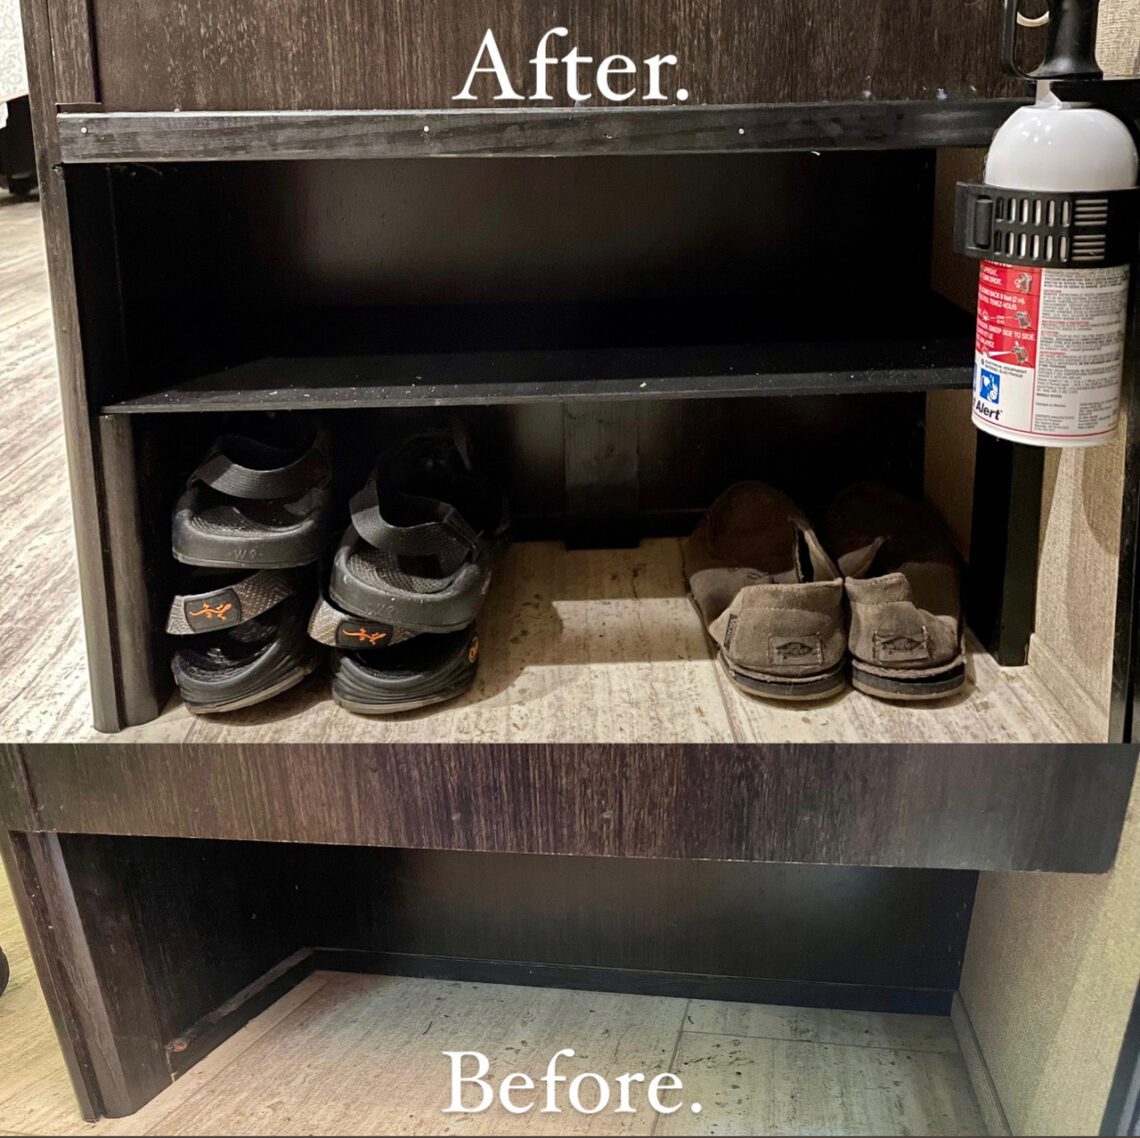
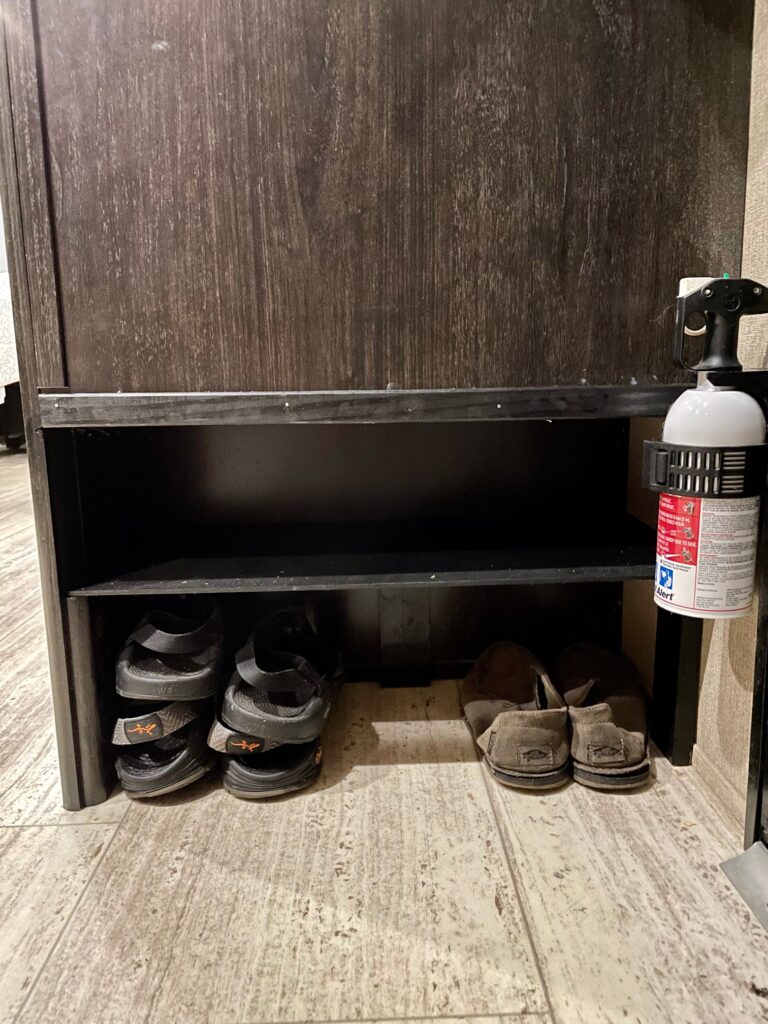
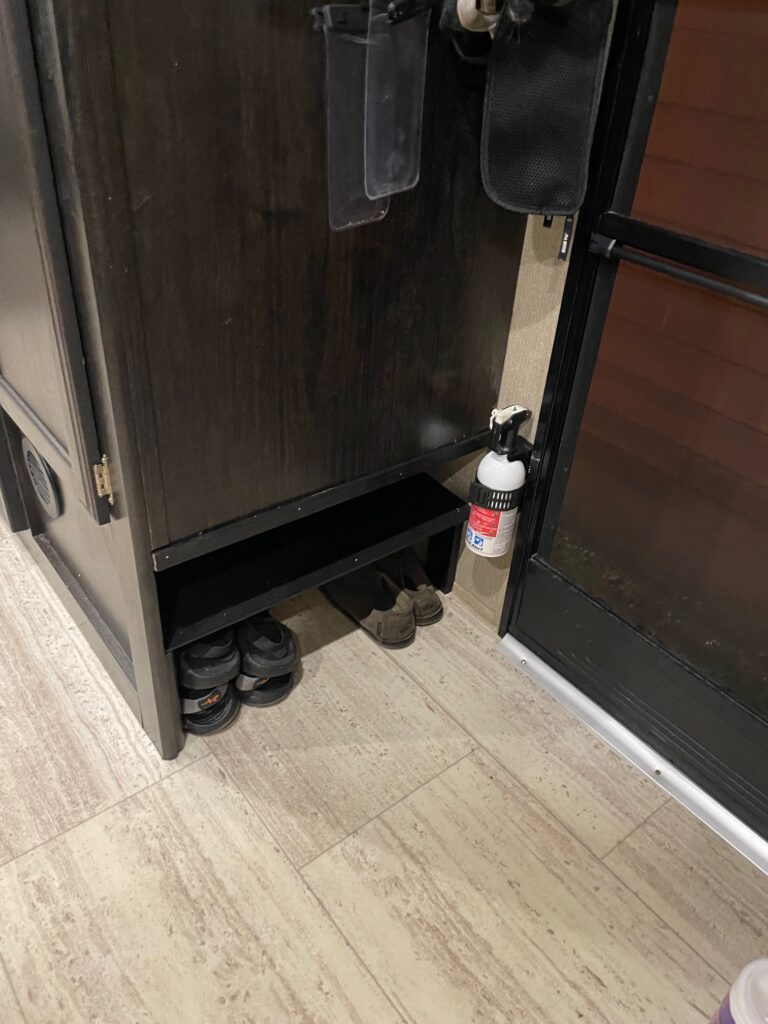
Additional Shoe Storage Modification
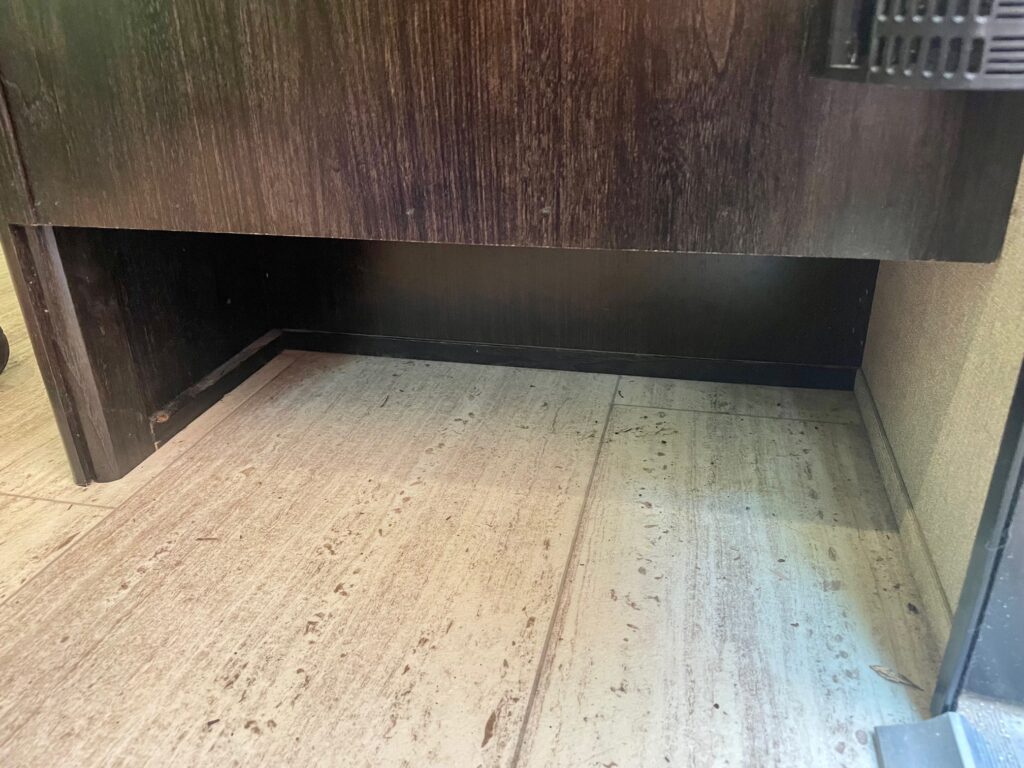
Our Grand Design Imagine 2150RB has shoe storage on the side of the pantry cabinet as you walk into the camper. The unit fits four pairs of shoes, however we are always looking for improved storage solutions. Many campers have completed this project in the past and we used Ross Stoico’s youtube video for reference. If you reach up inside the space the cabinet has quite a bit of open air. This piece is cut out to create room for a second shelf.
Some have said this project is easy, but I would call it doable. We own plenty of tools, but aren’t too comfortable with the circular saw. Our first step was to measure the inside of the cabinet and the open space above was about 15.5 inches in height. Then we cut that piece of wood and made a huge mess. At Home Depot we purchased wood for the 23-inch by 10.5-inch shelf, a 23-inch trim piece, and Ebony stain that is a close match to our cabinet.
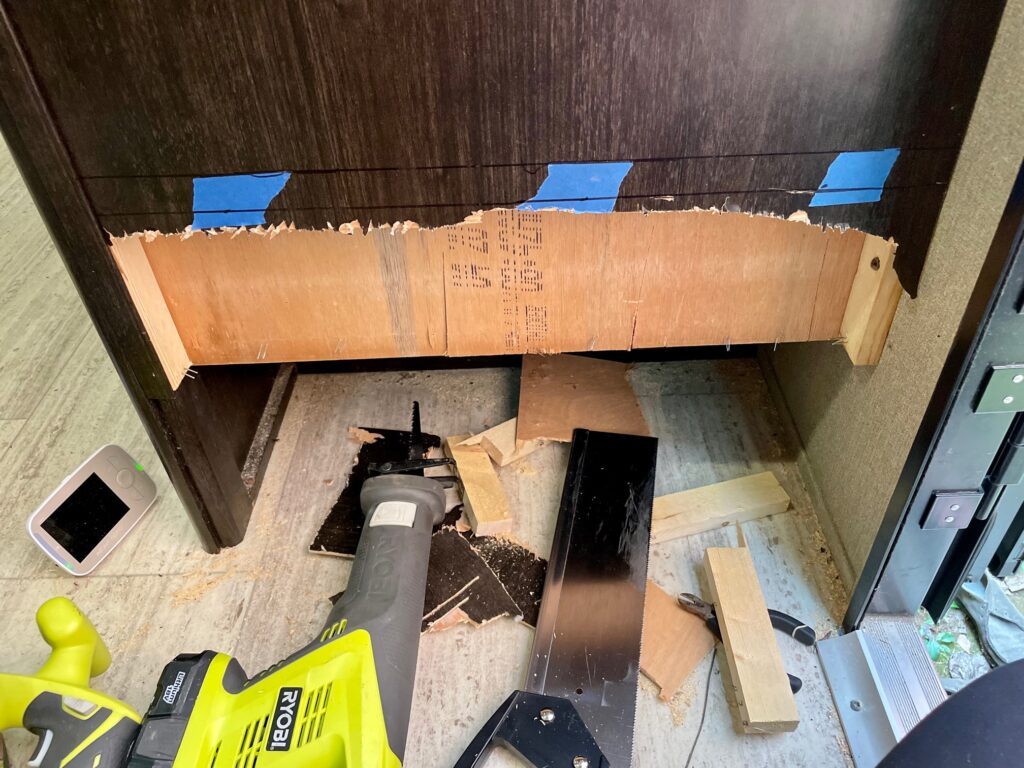
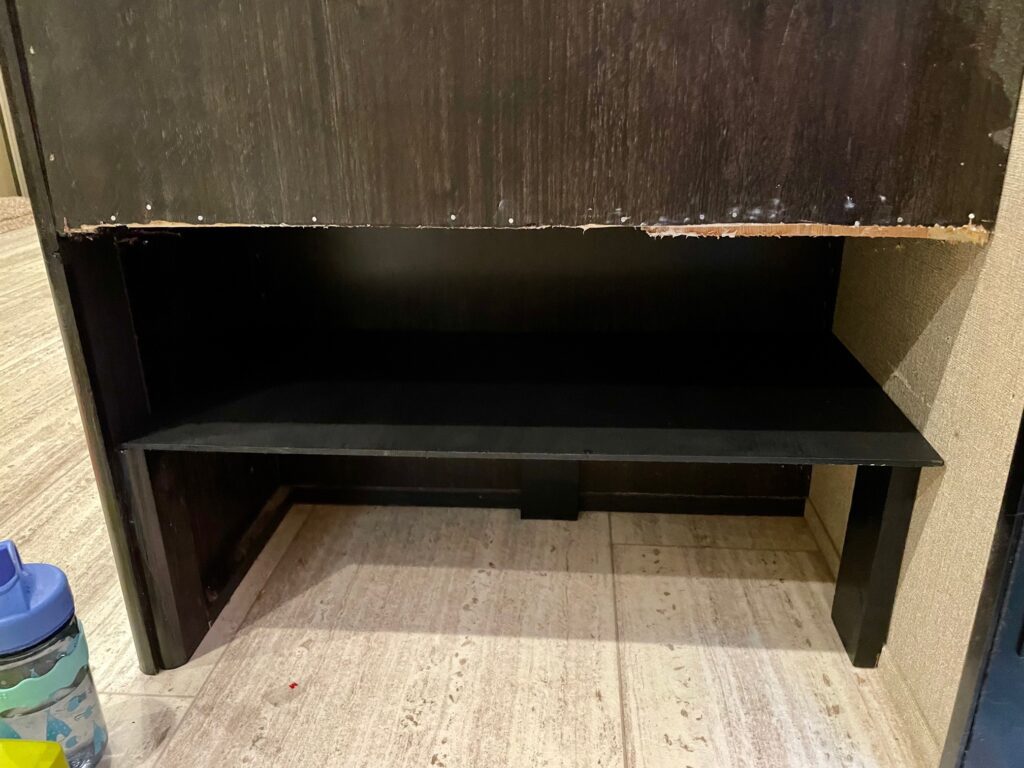
This project took us hours and lots of head scratching/frustration. It was worth it in the end. We love having the extra shelf and can pat ourselves on the back for following through with one of the more difficult mods.
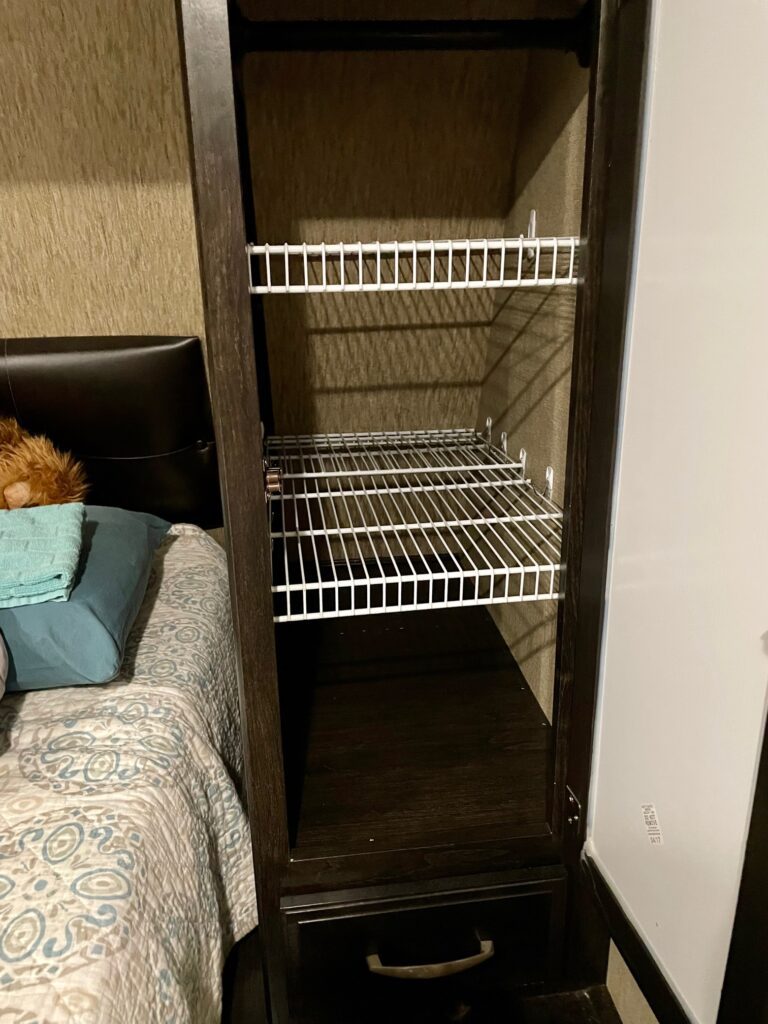
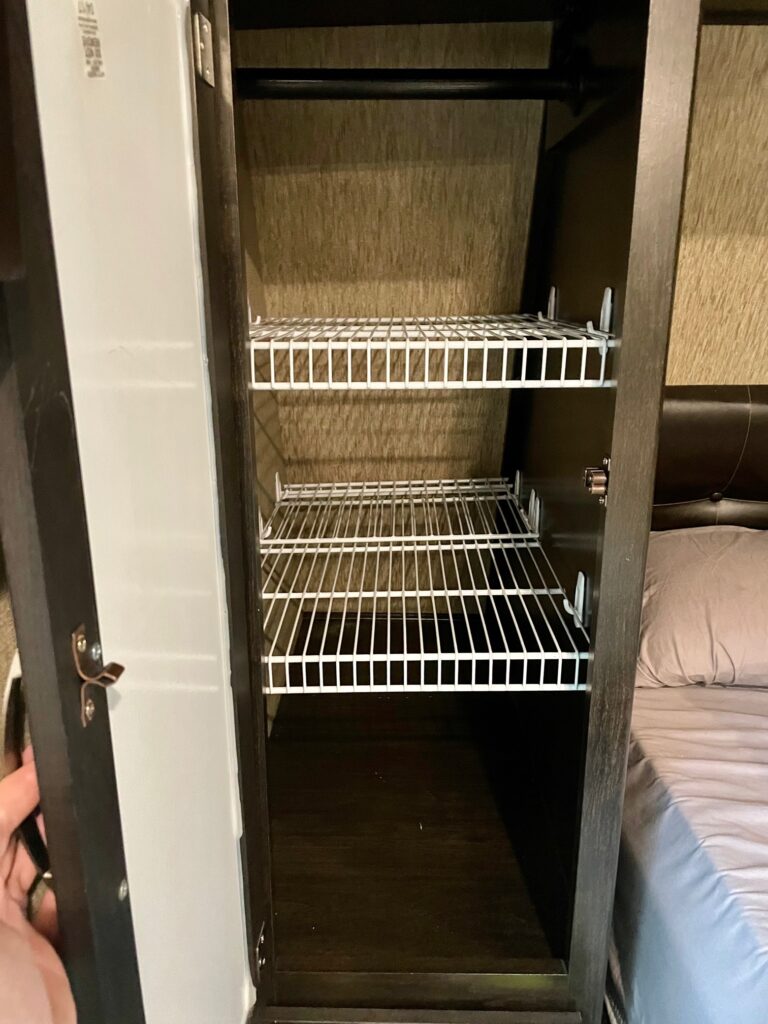
Closet Shelves Modification
In the bedroom we have large cabinets that are 15 inches in width on either side of the bed . Hanging shelves have worked fine for the past five years, however the shelves left unused space behind them. Using white wire closet shelves we cut a 20 inch (width) and 12 inch (width) down to 15 Inch pieces in length. For our project of two closets, four pieces of 15 inch by 20 inch were needed and two 15 inch by 12 inch shelves.
Using command hooks we hung the shelves in the cabinets. The bottom of the two shelves was not long enough and that is where the 12 inch was overlapped on the 20 inch. If you don’t have a level in your toolbox, remember that there is a level app in your phone. You will also need a flashlight to be able to see what you are working with in the cabinet.